
Last week was utterly manic. One element of the madness was my lovely friends birthday. For the past few years I have had the privilege of making her a cake. I wasn't very happy with the cake I made her last year, I know I am not a professional but there is still an element of perfectionism with anything I make! The idea I had in my mind just did not translate when I applied it to the cake. I was pretty disappointed with it. I decided this year to focus on one element and build up on that idea.
If you have been on Pinterest you would have seen the amount of chalkboard inspired art and creativity surrounding the look of chalkboards and fancy writing. The chalkboard look seems to be pretty popular for wedding cakes so I started pinning a few ideas that I had seen. Here is a selection of the ones that caught my eye.


I love all the flowers surrounding each chalkboard element. It is so feminine and beautiful I knew I wanted to create something similar.
The first step was to create some flowers for the cake. Fondant flowers or indeed buttercream flowers are not something I am especially good at. I do like at least having a go and if I go for the fantasy look they are far more forgiving when making mistakes!
I should also apologise for the quality of some of the photos in today's post. Someone forgot to check if the camera had enough battery power before settling down and starting!

The first thing I always do is raid my cupboards for all my tools, then I sit down and decide which ones I am going to use.
For these flowers I used fondant cutters, foam formers, shaping tools, lustre dust, flower formers, paste colours, coloured pearls and ready made fondant. A list of the items I used can be found at the end of this post.
For the large flowers I rolled out some jade coloured fondant and used my large sunflower/daisy cutter to cut out 2 shapes.

I try to roll out as thin as I can as it helps the petals to look more 'real'.

You can buy these online or in any cake/hobby shop.

I placed the first flower on my foam and began to press and smooth out the petals.

I used the wide flat part to smooth out the petals.

Looks more like a flower at this point. I then did the same thing with the other flower shape and then placed one on top of the other.


I took some of the coloured pearls (silver and teal), painted a little clear alcohol in the middle of the flower and fixed the pearls to it.

I then placed them on some greaseproof paper to dry out. I decided to keep these flowers quite flat as they were to sit on the side of the cake.

I also made some much smaller flowers in the same way except I only added one pearl to the centre of each.

I took some white fondant and mixed it with a little red to create a light pink shade for these next flowers. The cutters I used for these are more pointed so are great for creating fantasy flowers.

As before I layered these flowers up. I used 2 different sizes and built up 4 layers. I smoothed out the petals as before.

I took a small ball of yellow fondant and attached that to the middle pressing down to squash the ball flat.

I used a knife to indent the yellow middle then brushed pink lustre dust over the petals and gold lustre dust over the yellow middle. This enhanced the marks I had made and made the flower look more real.

I wanted to make a Hydrangea type flower so I used the smaller cutter and made a selection of pink flowers.

I made a large white fondant ball and attached the pink flowers to it using a pointed tool to press them into the white ball.

I used a little lustre dust on the edges of the flowers for a little depth.

You can't have flowers without butterflies right? I mixed 2 colours together and rolled this out thinly.

I cut a selection of butterflies out making sure I got a bit of both colours on each.

I mixed a little bit of water with some paste colour and painted the details onto the butterflies. I then placed them in a small flower former to shape the wings.

I also made some simple small flowers with yellow ball middles as fillers for the design. These were left to dry for almost 2 days before placing on the cake.

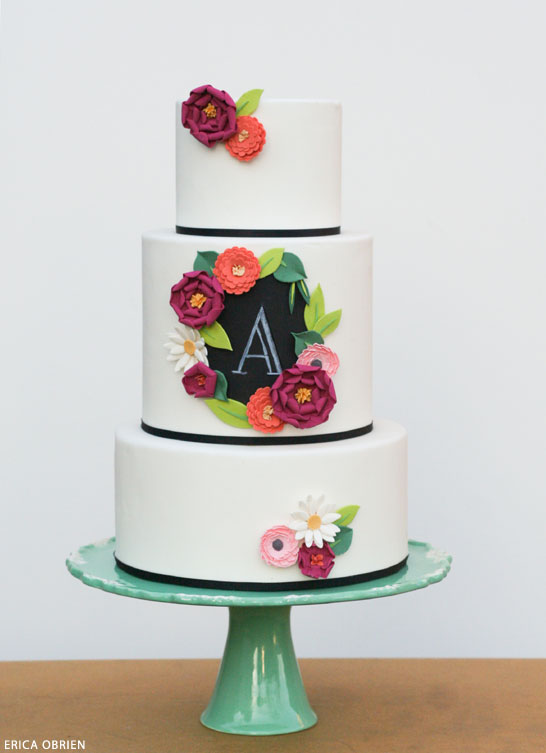
A little sneaky peak at the finished cake!

Come back Thursday to see how I made my chalkboard plaque and the finished cake!
Here's a list of the cutters and tools I used to make my flowers.


No comments:
Post a Comment