Thursday 21 May 2015

Kid's Birthday Party Ideas - Part Seven - Round up

So I've come to the end of my party ideas for kids. I have a couple more cake ideas to share with you as well as my party boards for all the inspiration you might need!

A few years ago my son wanted a race car themed party. On the day of the party it thundered and rained, so everything had to be moved indoors. For some reason I hardly took any pictures, apart from pictures of the guests and the cake, which is a shame, as it was a fun party! However, I do remember what we planned and how we set it out.

Firstly the cake. I used the Debbie Brown book where I had got the idea for the Dragon cake to make a Formula 1 style race car. You can buy a copy here. My son wanted a red car. Cutting the cake into shape was easier than I thought and it was a lot of fun putting it all together.


The cupcakes were simply frosted with a flag pick in each for the party guests to take home.

I purchased checkered flag picks, banner and balloons along with Cars the movie themed table ware.

Here are some similar items.

BLACK & WHITE CHECK NAPKINS, ETC. CAR RACING, FORMULA 1 NASCAR, ALL 1 LISTING


We set up the XBox on the projector and the kids could play Super Mario Kart. We also had an area set up in the front room with cars and a track.

In the kitchen I set up a craft area. The kids could make their own number plates.  I purchased foam which I cut into rectangles (2 per sheet) as well as different patterned paper and card. I printed out on the back of these all the letters I would need for the party guests to make their name with. I carefully cut them out and placed them on the table with different embellishments, glue and glitter. The kids could then be let loose to create their own 'plates'. These made a great party favour. My son owned some Scalextric sets which we set up in his bedroom and play room. The kids were allowed 4 at a time on these sets so that things didn't get too crowded or out of hand! Spreading the party out over a few rooms meant that no one was waiting to play with something or all jammed in one spot.
___________________________________________________

I do like parties that are held at other venues though we have only done this once or twice. My son loves Lord of The Rings and he wanted a party based around it. We decided to use a local centre that did archery as a party with toasting marshmallows round a camp fire. All I had to do was theme the cake accordingly! I made a chocolate cake with marshmallow frosting. The marshmallow frosting was meant to be a filling for the cake but I decided to use it to decorate with. As you can imagine, it is a very sticky frosting, but gives a great sheen to the cake. This made it the ideal choice to make the Eye of Sauron! Thinned icing would also work for this cake.

I tinted the frosting in the right colours and began by frosting the cake with the red, smoothing it very carefully onto the cake and letting it drip down the sides. I then dolloped yellow in the middle and spread this out to meet the red. I then got orange and black and dolloped small amounts over the yellow. I took a toothpick and spread the frosting out so that it looked like burning fire.

On the sides of the cake I wrote in Elvish copied from the Fellowship of the Ring book. The cake was a huge hit and it was the quickest cake I have ever decorated!
______________________________________________________________

So there you have it. Lots of ideas to host your next party! I've got party boards for most of the themes mentioned in the series, along with a couple others set up when toying with ideas for my son and friends children. Check them out below!

Have a great weekend!
Follow InspiredUK's board Angry Birds Party Ideas on Pinterest.

Follow InspiredUK's board Farm yard party on Pinterest.

Follow InspiredUK's board Knights, Dragons and Princess Party on Pinterest.

Follow InspiredUK's board Spiderman party ideas on Pinterest.

Follow InspiredUK's board My little pony party ideas on Pinterest.


Tuesday 19 May 2015

Kids in the kitchen - Chocolate Marshmallow Whipple Scrumpcious Cookies

Back in the Easter holidays my son's homework was to create his own cookies. They were looking at the history of cookies, why they were named cookies and how the different varieties were made. He based the name of these cookies on the Roald Dahl book 'Charlie and the Chocolate Factory'. Plus he helped design the title photo for this post!

He wanted them to be egg free so that when he took them into school, all his classmates would be able to sample them. The base of these cookies used the recipe from The Comfort of Cooking, which can be found here and which I used to create my Neapolitan cookies featured in this post.

I left him to make these completely on his own and only helped to put them in and out of the oven when it was time. I think it is very important to teach children how to cook, it is a life skill, and as they get older they want more independence. What better way then to be able to prepare their own food! And even better, prepare something that we can all enjoy!

He set himself up with the ingredients and utensils required to make the cookies. As you can see he is as organised as me! Fortunate to have a long counter so what he could spread out.

Carefully measuring out the ingredients ready to begin creaming the base of the cookies.

The fulfillment he got from making these was immeasurable. 

Here is the recipe for your budding cooks!

CHOCOLATE MARSHMALLOW WHIPPLE SCRUMPTIOUS COOKIES
(makes 12 approx.)

Ingredients

1 cup butter
1/2 cup icing sugar
2 cups plain flour
1 cup plain or milk chocolate chips

For the marshmallow topping
2 cups mini marshmallows
1-2 tsp butter

Method

Preheat your oven to 350'c/180'f. Line baking trays or cookie sheets with baking paper.

Cream butter and icing sugar together. Add the flour and then the chocolate chips. Keep mixing until a ball of dough forms.


Dust your work surface with flour or icing sugar (he used icing sugar). Roll the dough onto the surface and cut out with a round cookie cutter.


Carefully lift the cookies and place them on the baking tray.


Place them in the oven for 16-18 minutes or until they start to turn brown. Leave them to cool.


Once cooled they are ready for the marshmallow topping!

Place marshmallows in a pot on the stove with a little butter and with a low heat, begin to melt the mixture. Stir during this time to stop the marshmallow from sticking to the pan.


Once completely melted you can dip or spoon the mixture onto the cooled cookies.


My son decided to spoon the mixture onto one side of the cookies for a bit of a chewy taste.

When he took them in, his classmates thought they were chewy, tasty and very chocolaty. They got the big thumbs up from everyone!


Thursday 14 May 2015

Kid's Birthday Party Ideas - Part Six - Superheroes Spiderman

Superheroes are a very popular choice for birthdays. Granted, this is usually a boy's choice rather than a girls, but there is still fun to be had for everyone at a party.

Decorations are very easy to come by for this theme. This cuts down a lot of time when getting your house or venue ready for the guests. I've listed below some of the current ones available.

Spider-Man Party Pack - Value SAVE 20%


Amazing Spiderman 2 Paper Party Napkins


As well as the themed cups, tablecloths, plates and napkins, I purchased Halloween spider decorations that were hung from the ceiling. I also managed to get hold of a wall web decoration with spiders

For outside I purchased a long line of spiders which were strung all over the garden suspended in the trees (you can just make them out in this picture). I also blew up pictures of Spiderman's enemies and stuck these around the garden (they formed part of a game later). The pictures were made into posters by using Picasa's poster creator and printing each out on 4 sheets of A4.

Party food was kept simple with vegetable sticks, breadsticks, hummus and barbecue food.

The posters were used for a game where each child became Spiderman. As the children were quite young, I purchased rain ponchos which they decorated with stickers of Spiderman along with other fun bits to create their 'capes'. I purchased silly string which I gave to the parents to help their budding Spiderman defeat the enemies! The children put on their capes and had to spray each enemy with the silly string (with parents help).

They had a lot of fun with this game!

In the background you can see some webs on the floor. This was a musical statue type game where the children had to leap onto a web and not fall off.

Parties usually have a Pin the Tail on the donkey game, so here it is changed into 'Pin Spidey on the web'. The children were blindfolded and had to get their Spidey as close to the middle as possible. I made the web with curling ribbon on a red card background.

As well as the party games, I set up garden games so the kids could just have fun!


Cupcakes were kept simple with Spiderman colours and pre made toppers.

The cake was made using a shaped Wilton pan and following the directions given with the pan.  This pan is no longer available (you can find them occasionally on sites like EBay), however, Wilton now do this one.

Spider-Man Ultimate Cake Pan

It can be found on their website here.

This is a very simple party to put together and is a big hit with kids.

Have a great weekend!


Tuesday 12 May 2015

Easy Family Weeknight Dinner - Chicken Cacciatore

My house is a mess. It is an intentional mess. We have begun demolition of the master bedroom furniture, carpets and curtains. There is stuff everywhere! We have moved into the guest bedroom with some of the old furniture. I have to find homes for all our clothes around the house so that we can take apart the wardrobes and begin sanding, filling and painting the walls. It is a mammoth task with only 4 weeks until the new furniture turns up. Factor in work, school and the usual daily tasks and the end of the month is creeping ever so closer! I know it will be worth it when it's all done, but the inbetween stage with stuff all over the house causes me to have stress!

Dinner times need to be quick and easy, something I can just throw in the oven, slow cooker, or make on the stove top in about 30 minutes.

When I was a child, my father was in the Air Force. From time to time he would go on assignments away from home. These would usually be for only a few days, perhaps even overnight, so my mother would make me something special, something that I loved and my father was not so keen on.

My Mum was practically a vegetarian all her life, she would eat a small slither of turkey at Christmas, the odd bit of bacon, and salmon or tuna. When I was a child, I had no idea my Mum did not like meat. She told me years later that it was just easier to make a dish for us all and she would just have very little to no meat from whatever dish she had prepared.

She had a table top cooker like this one.
My Mum's cooker was red, and I only remember her making Chicken Cacciatore in it. She would throw all the ingredients in there and let it simmer and bubble until dinner time. I would peer in and look at the lovely tomato sauce cooking, not being able to wait until dinner time! I do the dish on my stove top and it is ready in 30 minutes! I hope you enjoy it.

Chicken Cacciatore

Ingredients

2 1/2 lb chicken breasts (1 per person)
1/4 cup plain flour
1/4 cup oil
1 onion, chopped
1 pepper, chopped
1 clove garlic, minced
1 1/4 tsp salt
1/4 tsp pepper
2 bay leaves
Carton of chopped tomatoes
Can or bottle of tomato sauce/passata
1/4 cup dry white wine

Method

Coat the chicken in the flour.


Heat oil in a pan, add chicken and cook until light brown, turning occasionally. Remove the chicken and set aside. Add onion, pepper and garlic to the pan and cook for 3 minutes.


Add the chicken back to the pan. Add seasonings, chopped tomatoes, tomato sauce and wine. Cover and simmer for 30 minutes.


Turn the chicken occasionally during the cooking time.


Serve on it's own, with bread or over rice.

Tasty and oh so easy!


Thursday 7 May 2015

Kid's Birthday Party Ideas - Part Five - Farm yard (perfect for pre-schoolers!)

So I am taking my memory right back with this part's birthday theme! Pre schoolers love all the classic nursery rhymes like Old MacDonald and that became the inspiration for this birthday party. All of the pictures for this party were taken indoors as we had a torrential downpour the day of the party. If you have the room it is possible to host a party that was meant to be outdoors, inside.

I had recently bought some new Wilton year books and stumbled across a barn themed cake using their stand up house pan. I managed to source a second hand one in it's original box from EBay at a very reasonable price! It seemed simple enough and at that time I had not really expanded my cake decorating skills much past the star tip! I am sure I could do a better job now but at least it looked like what it was supposed to! Wilton.com have a similar cake on their website here.

At the time my son was a pre schooler we went to various groups during the day, meeting other children and Mums, taking part in fun activities, of which one was an art club. This art club provided party packages, a selection of items that could be used to create pictures and sculptures. I thought this was perfect for pre schoolers who probably wouldn't fully understand party games but liked getting messy with glue and paint! For this barn themed party we had 3 pictures the children could recreate. The first one was a picture of a lamb that the children could decorate with white cotton wool or foam to create the lamb's coat. The second was a picture of a hen which the children could fill in with coloured pieces of paper. The final picture was of a pig, the children could stick the pig shape onto some card and then use some brown paint to create mud. We also had some black and white pictures that the children could colour in. All the materials were supplied by the art club, however, this would be very easy to recreate by scouring the net for images and printing them out as many times as you would need. 

In the picture above you can see the example pictures on the window sill so that the parents would know what the children were to create. My husband made a low table which we covered with a plastic dust sheet and set up the pictures on it. On the floor we laid fabric dust sheets to protect the carpet. We used my sons plastic table for the colouring pages. A friend was kind enough to donate a couple of hay bales to make the place feel more like a farm! Plus they gave us a few extra seats. I also set up on a chair in the corner of the room a washing station. This was a washing up bowl with water, soap and towels. This worked very well considering the ages of the children present.

As you can see we also sourced farm yard party supplies. Below is a selection that are currently available.

Farm Friends 8 Person Deluxe Party Pack.png

Barnyard Bash Table Centrepiece


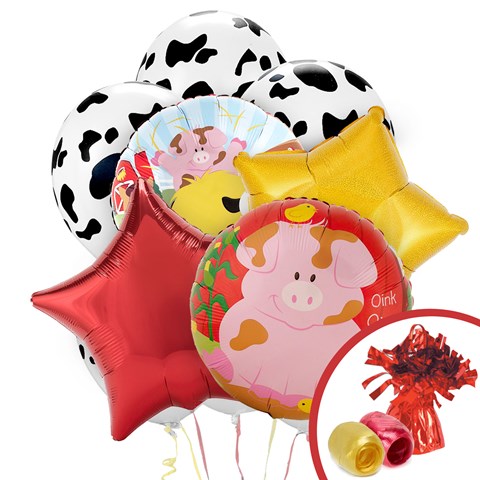
Barnyard Balloon Bouquet


Farmhouse Fun 1st Birthday Express Party Package for 8


Part of the party pack included some blow outs which are a lot of fun for little ones. It also came with a table centrepiece which I placed here on the side board. As always I like to bring a personal touch to my son's parties and created some items with the use of large cardboard boxes. On the wall is a welcome sign I made out of a piece of card. I cut the edges to look like a plank of wood and painted it a light brown colour. I then used a felt tip pen to draw on lines and knots for the wood. I then used a little white paint to write the 'Welcome' sign. I also made a sign which was going to be placed in the garden before the rain came. It was similar to the one on the wall except that I used a piece of cardboard attached to the bottom to look like a sign you might see in the ground.


I used a plant pot to house the sign! This was to direct the children (well really the Mums!) to the 'Petting Zoo'. Children love to cuddle little animals at farms, so naturally we had to have one of our own!  I used 2 boxes to create a 'barn'. The first was up ended so that the opening became the doors. I then painted the box red with white crosses on the front to represent the barn doors. I took another box and cut it to size to fit on top of this one.  I also cut and taped the top to form a peak for the roof. I used a lot of tape! This was painted black with the front painted red to represent the roof of the barn. I cut a whole in the front and placed a few cuddly creatures in. I then filled the barn with animal cuddlies. I used a lot of my beanie babies for this along with my son's toys. The children had great fun popping along to the 'Zoo' and having a cuddle.

The party in full swing! Lots of creating going on. I can highly recommend this style of party for little ones.

I kept the food simple, finger style but catering to the Mums that stayed and played. Lots of veggies, bread sticks, fruit and animal shaped cheese bites!

The cake was very easy to decorate. The large cake board was covered in buttercream with toasted coconut strands to represent hay. I purchased marzipan animals to save time though of course you could have a go making these out of fondant. The fence was made of bread sticks stuck together with cream cheese. Finally, the hay bales were small muffins with icing piped with a string tip.

I sadly do not have a picture of the party bags. They were purchased on EBay and had personalised tops to each bag. The contents were themed to the party. 

Have a great weekend!