Thursday 30 April 2015

Kid's Birthday Party Ideas - Part Four - Star Wars

Star Wars can seem like a very male theme for a birthday party. It is true, I am not sure how many girls would enjoy this party as their own, but the girls that were invited enjoyed themselves as much as the boys! Plus as a girl I was very girly but I still begged and dragged my Mum to the movies to watch Star Wars, Star Trek, Indiana Jones and some dubious other films like er Beastmaster!

For this party I wanted lots of interaction with the kids. I had scoured Pinterest for ideas and gathered together those that I thought would work best. I needed more help from the grown ups and roped in my husband and brother in law to have staring roles!

I purchased adult Obi Wan Kenobi and Darth Vader costumes and my Mother in law made simple tunics for the kids to wear for their roles as Padawans. The tunics had a large hole to place over the head and I purchased gold cord from Hobbycraft for the belts. My son wanted something a little different to his friends so he borrowed a silver belt of mine to wear with his! The kids kept these tunics on for most of the party despite it being an extremely hot day. Plus if they wanted they could take their tunic home as a party favour.

Party decorations were very simple and easy. I purchased a large black poster roll which I taped together to make one large back drop. I then found Star Wars pictures from the web, printed these out and stuck them to the back drop. I also found a Star Wars font and used this to create the slogan 'May the Force be With you'. I also purchased a bunch of foam stars to add to the backdrop. Other Star Wars pictures were stuck on doors and windows. I got a star shaped helium balloon and wrote my son's name on it.

Admittedly I didn't do a very neat job when making the back drop but I was pressed for time! I also found some Star Wars confetti and birthday banner online to add to the table. I bought all silver cups, plates, tablecloth, napkins and cutlery and painted a shoe box silver and a foam block black. My son had a model Millennium Falcon and a small R2 D2 robot which I added to the table. All the food was placed on the table away from the 'training' area!


Birthday boy all dressed up and ready to party, I mean train!

I sought lots of inspiration from Pinterest for the food. If you head to my Pinterest board here you will find all the original ideas I used to create this party.

Many people had created tented cards for the food so I decided to do the same. I found a space picture online, and using the Star Wars font created fun names! Some again I pinched from other parties I had seen, so I cannot take credit for most of them!


Here we have the Endor trail mix! This was just a selection of potato snacks in varying shapes housed in a metal bucket.


This was a big hit and so easy! The Sarlacc dip was a pre made pot of hummus with string cheese seperated out and stuck in the top!


Veggie Sabers (Vader's Veggies) were strips of vegetables and bread sticks that had a saber shape. These could also be dunked in the hummus.


I love the name for the popcorn! Obi Corn Kenobi!


I decided to make pops that were a lot easier than cake pops, so marshmallows came to my rescue. I just had to draw some Stormtrooper faces on with an edible pen and stick lolly sticks in the bottom. These didn't last long! 


Yoda soda was featured in a lot of the parties I looked at. I used lemonade with some food colouring along with some plain water for those who weren't keen on the green stuff!

Wookie Cookies also featured on a lot of parties and they ended up being one of my favourite things! I made double chocolate cookies and then decorated them with chocolate buttercream and fondant. To make the Wookie fur I used a star tip, and starting from the top I created strips of fur, overlapping as I went to build it up. I then cut out shapes from fondant for the features.

All of these things were relatively easy, the cake was another story!

My son liked the look of this one.

star wars - Vadar!

An impressive cake to say the least! I decided it could't be too hard to replicate as there is a lot of black fondant which could be used as the cloak and hide any dodgy bit!

How wrong I was! I made 2 cakes, a square and a rectangle which I trimmed to give the right shape. Making the cloak actually turned out to be very tricky and I ended up with a very thin Vader!

Here is my version! Not a patch on the original, however, my son thought it was pretty cool and that was enough for me.

Now onto the party itself! We made up games related to Star Wars as 'training' for the kids to become Jedis. This was inspired by other parties I had seen.


A Jedi cannot be without their light saber! I made these following this tutorial by Muddy Boots. Each child got to pick their own and again this was another party favour.

We set up an obstacle course and this part represented the Dagobah system and the training that Luke goes through. The kids had to carefully step between wood rounds, head through the 'cave' and then balance along some logs while holding their light sabers! This was 2 large cardboard boxes covered with blankets and sheets.


First part of the training!

Balancing skills.


Obi Wan keeping a close eye on the trainees.

Careful balancing.


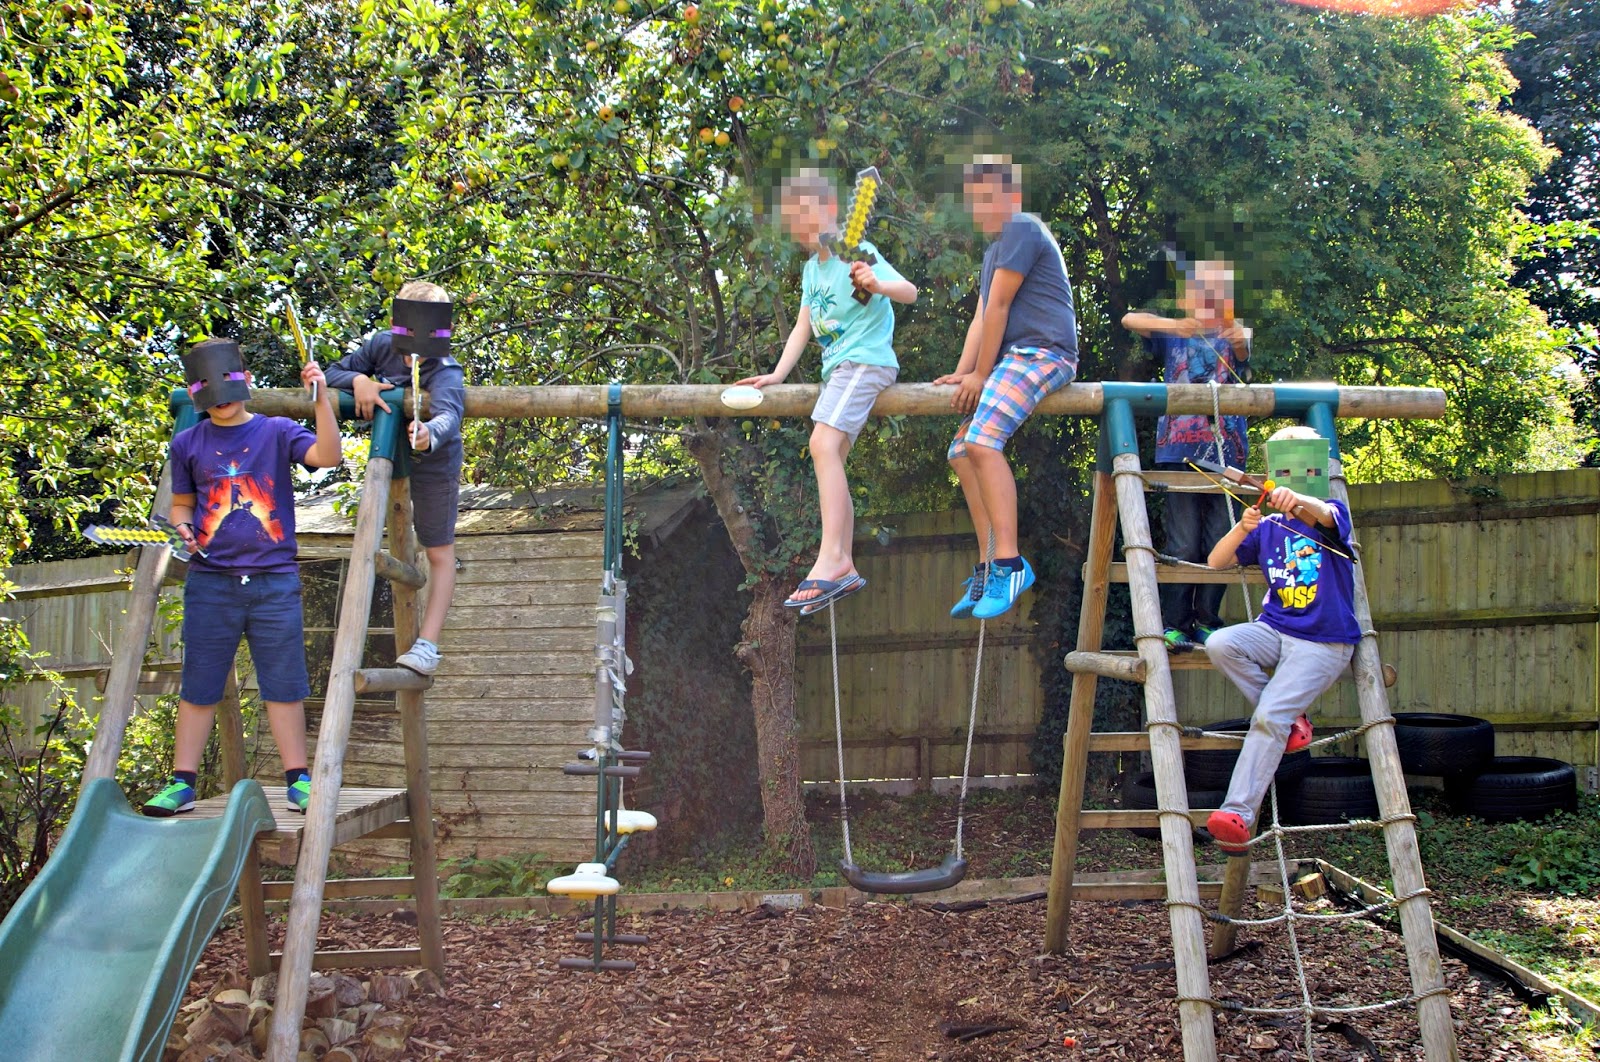
The swing set came in very handy as they had to climb up and over and down the slide as part of the obstacle course.

Moving onto the planet Hoth and the Wampa cave!

The kids could practice their light saber skills in the cave.

Or indeed on each other!

Lots of practicing going on!

Obi Wan then showed them how to balance balloons on their light sabers. This caused much laughter when Obi Wan failed in his attempts!

The training was interrupted by the arrival of Darth Vader! Obi Wan started to battle him and then instructed the Padawans to 'Get him!'


Obi Wan took over and forced Darth Vader out of the garden and came back with Darth's head!

Well, I say head, it was actually a Darth Vader Pinata!

You can purchase a Pinata kit here. The kids destroyed the head and claimed their prizes! Obi Wan then gave each Padawan a certificate for completing their training.


I used these free certificates and printed out on white card.

After all the training, it was time to eat and relax with a cool drink. When they had finished eating they just had one more task to tackle. Han Solo had been frozen in carbonite and needed to be helped out!

I got the idea for this from Lemon Squeezy Home here.

It was a good game to cool down with and relax after all the excitement of the training.


A very successful and fun party!

Have a great weekend!


Tuesday 28 April 2015

Burger Stuffed Peppers

Whenever I visited my parents, my Mum would make some of my favourite dishes from my childhood to welcome me home. As a child I was incredibly fussy, I ate very little, and most dinners were a battle. There were some exceptions to that though, some meals I just fell in love with and couldn't get enough! One of those dinners was stuffed peppers which my Mum would serve with boiled potatoes and extra vegetables, not the mention the obligatory hot sauce!

Mum gave me the recipe when I moved home and even though I can't make it exactly the same way as she used American ingredients I can't get in the UK it is still a tasty dish that I and my family love. I hope you will enjoy it too!

BURGER STUFFED PEPPERS
(Serves 4 - 6)

Ingredients

4 medium-large green peppers (red and orange can be substituted)


1lb ground beef (This works just as well with less)
2 cups cooked rice 
1/4 cup chopped onions
Salt and pepper
1 400 to 500g bottle or box of passata (1 15oz can tomato sauce)
1 cup grated cheese

Method

Cook rice of your liking,

Halve peppers lengthways and de-seed. Pop into a pan of simmering water for only about 2 minutes and drain.


Yes I know these aren't cut in lengthways! But you get the idea!

Lightly mix beef, rice, onion, salt, pepper and 1/2 cup of passata/tomato sauce. Pile this mixture into the pepper halves, top with cheese and arrange in a shallow baking dish.


Pour remaining passata/sauce over the top. Cover and bake at 350'F/180'C for about an hour.


You will have lovely soft peppers with a tasty filling along with a little sauce to spoon over the top.

I served these with salad and peas but it is especially tasty with boiled potatoes and corn!


As I didn't cut these ones lengthways, one pepper was enough on it's own. When the peppers are cut lengthways those with a bigger appetite can have more!

This is a great family dinner, kids and adults will enjoy it. The passata can be substituted for spaghetti sauce or your own home made sauce. The beef can be substituted for turkey mince or Quorn mince. 

Let me know if you make it!


Thursday 23 April 2015

Kid's Birthday Party ideas - Part Three - Minecraft

If you have been living under a rock or don't have young kids you could be forgiven for not knowing anything about the phenomenon that is Minecraft. If you have young kids however, you will know just how popular this computer game is.

My son got into Minecraft some time back. He had seen it at another friends house and enjoyed playing with the blocks, making houses, boats etc. We downloaded a demo for him to play with and once we saw how much he enjoyed it, we purchased the full copy. I like this game as it allows my son to use his imagination rather than just staring at a pre made, pre determined game. He has many different 'worlds' with different themes, and he has friends he can play with online which I think he enjoys the most!

I knew that at some stage this would become a theme for a birthday party and sure enough he asked for it! As the game has become so popular, there is a whole host of party ideas out there, from items that can be purchased to downloadable freebies or packs which can be bought from places like Etsy.

I like to find freebies that I can either use or inspire me to create my own. There was plenty to choose from!

You may have heard of a great site called Catch my Party. They showcase people's birthday parties, catering for a huge range of themes. It is a brilliant place to find inspiration and also occasionally they have freebies! They had some free Minecraft printables which I just had to have! You can find them here. I didn't use all of them and also I found other ways to use some of the printables from their original use.

Let's start with the party decor.

I used the banner for the food table. I printed it out on white card and attached it to string to hang up. I had seen online someone using black and green balloons to represent creepers, so I did the same. I used the food cards to set up the table adding in a couple of ideas of my own as the pack does come with a blank card. I found another set online with different items on them and printed those out to stick onto the blank cards. Sadly I can't find the original link, however, if you recognise these and can point me in the right direction to give them credit, please comment below!

I followed some of the ideas I had seen online for the food ideas. Strawberries for Redstone, Watermelon for, well, Watermelon and Twizzlers for TNT.  I had seen online a way to make candy to represent Diamonds, but I just purchased some clear mints.

Grapes for Slime balls, miniture cookies for Cookies, and Rolos for gold. I couldn't buy individually wrapped Rolos, so got some gold foil and wrapped them myself.

I bought toffee apples for Golden apples but you could just use apples, mini crisp sticks for Sticks, mini bread sticks for Bread and mini carrots for Carrots. As the party was held in the late afternoon, snacks seemed the best option. I had extra amounts to re fill the trays, which I had to do many times! I bought clear plastic trays and black foil trays from Sainsburys.

After seeing a few parties with grass tablecloths, I ordered a plastic tablecloth which looked like grass.

I did attempt to make some coal, using this pin. I could not find the original link, so had to guess quantities for the ingredients. I will say I used too much butter so they weren't very sweet. Also they did give anybody who tried one a black tongue!

I also found some free printables to make your own cardboard Minecraft characters. I selected a bunch I liked, carefully cut them out and stuck them together. They took forever! They were a real pain but the effect was good! I used double sided squares to stick them together as they were so small and fiddly to use glue, but whatever is your preference. You can find the printables on my Minecraft party ideas board here.

I purchased green square plates and napkins from Ebay. I did think about making Creeper faces for the plates as I had done for the Lego party but decided to leave them blank. I also purchased black cutlery but not a lot of it was used.

To finish off the decorations for the food table, I made some paper chains which I also found online. They can also be found on my Pinterest board.


I always like to decorate the front door to welcome the guests to the party. I found a poster online, and using Picasa's poster tool, was able to enlarge it, stick it onto card and attach it to the front door. I also found online a printable for the Minecraft signs. I also downloaded a Minecraft font and edited the sign to allow me to write anything on them! Again these can be found on my Pinterest board.

We had games set up in the garden that the kids could dip in and out off as well as my son's swing set and snooker table to play with.

I'd seen 'Pin the tail on the Pig' Minecraft games and it did seem kind of fun. I again went searching for a large picture and blew it up using Picasa's poster function. I stuck the print outs onto card and made little pink strips for the kids to pin. They all enjoyed it mainly for the Minecraft goodies they won!

I came across a pin from Ziggity Zoom which featured Minecraft party ideas (you can see the original post here). The main thing that caught my eye was the foam Creepers they had made to shoot with bows and arrows. I managed to secure a bunch of square boxes from a store which I then painted green with black sharpie features for the Creeper faces. I purchased 2 cheap toy bow and arrow toys from The Entertainer and made a sign to indicate what the purpose of the game was. I set it up on a foldable picnic table and away from the main party area so that the kids had plenty of range using the bows. This was a big hit!

We used our gazebo as a Minecraft house. I printed out different Minecraft blocks and stuck them to the sides of the gazebo.

I set up another sign saying 'Defend the house from the mobs, use your sword'. As you might be aware, the foam official swords you can buy are extremely expensive. Thankfully Pinterest came to the rescue with this post from All for The Boys. She had designed a Minecraft sword in 2 pieces that you could then stick onto foamboard and cut out! It's genius but a total pain to make! I am glad I only had 8 to make! They didn't last long as I suspected once the boys started playing with them but they loved using them. I put these and the bow and arrows in buckets so that they were easy to get hold of.

I thought they might enjoy wearing masks so that some of them could be 'mobs' and others could be 'Steve',  I used the life sized heads from Pixel Papercraft (you can find them here), which I printed onto paper, then pasted onto card. I hole punched holes either side and tied black elastic through the holes. You could just print them directly onto card.

No Minecraft party would be complete without a brewing station! There are loads of these floating around on Pinterest, and you can purchase sets to make your own. I made mine for free!

I used a large piece of foam board for the sign. I found a picture of a potion bottle online (the one I used can be found on my Pinterest board) and enlarged it. I then printed it out and coloured them in based on the Kool aid sachets I had managed to get hold of. I tried to match the game as much as possible by researching the colours of the potions. I also found online picture of the brewing stand as it looks in Minecraft. I printed off the potion names using the Minecraft font and stuck all this to the foam board. We experimented before the party with how much Kool aid powder, sugar and water would be needed for one drink. I then added those quantities to the potion board so that the kids had a recipe to follow.

I used the blank food cards to show the flavours of the drinks (the flavours were also written on the potion board). I had some plastic jelly cups left over and used those for the Kool Aid powders and sugar. I had large plastic jugs for the water and green cardboard cups for them to make the drinks in.

They all went back to this station many times, and all I can say is I am glad it was outside! Powder, sugar and water everywhere!


They had so much fun outside, but of course no Minecraft party would be complete without an actual go on the game!

We split them into pairs and let them have short timed goes so that everyone had a fair shot playing. My son had set up a special 'birthday' world.

The others either watched or carried on playing outside. We are glad we limited time on the game though as we doubt they would have had much time to enjoy the outside activities. 

My son was very happy with his cake! I did make the mistake of using a brownie cake recipe, that while delicious, did not rise very well. We didn't end up with a cube, more a large square! I was able to purchase square fondant cutters from Hobbycraft, and following ideas found on Pinterest, was able to cut out the right colours to represent a grass block. I made the toppers out of fondant following other cakes and pictures from the game. I didn't think I would do a very good job on the sword, so used one of the cardboard cut outs.

At the end of the party I wanted to give out party favours. I had seen other people making Creeper faces on plain party bags using a sharpie. I found a template of a Creeper face, printed and cut it out and used that to draw faces onto the bags.

Everyone got a piece of cake along with all these goodies! I purchased the wristbands from EBay, but the rest was homemade! The Enderman and Creeper keyrings were made with Hama beads. I purchased key rings and attached them to the beads once they were ironed. You can find the Hama bead designs on my Pinterest board.

I found a blog called Unskinny Boppy and she had a free printable for Minecraft magnets. I purchased magnetic sheets from Hobbycraft, printed out the free printables on photographic paper, glued this to the magnetic sheets and carefully cut them out once dried. This was very successful and cost me about £6.00 for the sheets. See the original post here.

Finally I found this blog called Say Not Sweet Anne. She had made fantastic Creeper shaped marshmallows which I knew I just had to copy! There were such fun to make, my son and I were transfixed as the mixture got bigger and bigger and more marshmallow like. Find the instructions here.

The party was a big hit and would be great for any Minecraft fan!

Click here to view my Pinterest board.

Have a great weekend!