Tuesday, 31 March 2015

Easter Egg Hunt Printables - Free!


We love a good egg hunt here on Easter Sunday. We tend to set it up indoors as the weather can be very changeable! No one wants soggy eggs!

We set up a basket and sign just outside my son's bedroom door, then place clues, arrows, and bunny feet around the house for him to find. In years past I have used those filable plastic eggs to hold non candy treats as well as hiding the assortment of chocolate eggs he receives year upon year! This year I just couldn't find much that would fit into those eggs that he would appreciate now that he is a year older. Instead I bought some small wrapped mini eggs, a couple of toys/books along with his main Easter eggs. I think he will still enjoy hunting for those!

There are some very creative peeps out there who very generously share their printables for free with the rest of us. I have listed below my favourites, along with those we have used in years past, as well as giving you my own designed printables! This is my first set of printables and I hope you like them! They will each print out on A4 paper or card. The bunny feet aren't huge but they are brightly coloured and can be seen easily on the carpet or amongst the grass! Right click and open up the picture in another tab. Save the image to your computer and then print out.

Enjoy!


You can attach this to a stake to set up in the garden or stick to your stair banister or a door!


Bunny feet! Print out as many as you need!


Simple arrows to help your kids navigate the goodies! Print as many as are required!


MY FAVOURITE FREEBIES FROM AROUND THE WEB

Easter Egg Hunt Printables - illistyle.com for OvertheBigMoon

These fun signs are a nice change from the arrows and eggs! Find them all over on Over the big moon


There are a whole host of cute printables over at Adventures at Greenacre including egg hunt clues!


This lovely Spring set is by Embellish, go check them out!


DesignEditorEasterPrintables

Another cute coordinated set from Design Editor


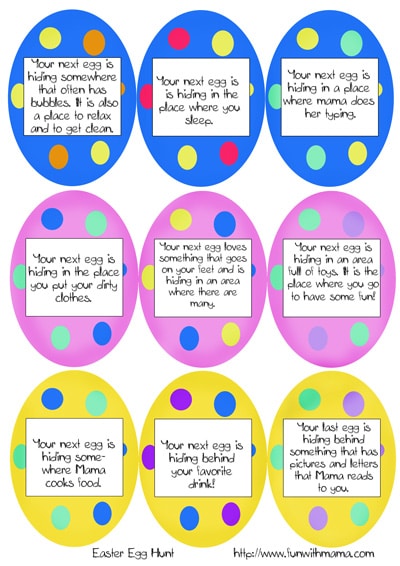
These clue eggs are great and also come with a set of blank ones to write your own! Find them at Fun with Mama


This set of signs inspired mine and we have used them in the past. Find them at The diary of Dave's Wife


More cute bunny feet! Find them at LoveMae


easter egg hunt signs

And finally some more fun arrows! Find these at UnfortunatelyOh


Friday, 27 March 2015

Buttercream Easter Cookies


Everyone likes treats at Easter. Lots of chocolate eggs, perhaps a lovely roast dinner, cake, pie, cookies, the list is endless!

My son loves Easter egg hunts. For a number of years I have filled little plastic eggs with pocket money toys, stickers, bubbles while also hiding the assorted eggs and other goodies he receives from friends and family. This year has got to be the hardest I have ever had in finding him things for the hunt. He is in the tween age. Some of the pocket money toys just seem too young or uninteresting to him now. This means that the things he is interested in become that much more expensive! I prefer to use Easter for token gifts rather than another birthday or Christmas! He does still like the cute and his favourite animal is a hedgehog but I couldn't find any of those either! I managed perfectly well on the chocolate front! I think that the things I have found will be appreciated and he will still have fun Easter Sunday! Fingers crossed!

I rarely make cakes or cookies for Easter as I have birthdays slap bang in the way! So we have birthday cake and what with all the chocolate, an Easter cake or cookies is just a no no! However, if you enjoy making some treats for your dinner guests or just because it is Easter, you may like these buttercream cookies I made.

I made some of the shortbread cookies I shared here. This time I added a teaspoon of lemon extract to the dough as that seemed a more Easter flavour to me! They really hold their shape which is why I like to use the recipe when making cookies to decorate. Plus they do not use any egg so great for allergy sufferers!

I used chocolate, lemon, vanilla and orange buttercream which all complemented the lemon cookies.


They didn't last long!


Freshly baked cookies! These do not spread at all in the oven, perfect for shaped cookies.

I always make more buttercream than I need for a cake as I would rather have too much than not enough. As I have made a few cakes lately, the amount of frosting in my fridge is pretty extensive! I decided rather than decorate the cookies with royal icing, I would use the buttercream instead!

Firstly I made up a small batch of Royal icing for outlining the cookies. I tinted it yellow with Wilton lemon yellow colour, used tip #2 and outlined the cookies.


I left these to dry while I gathered my supplies for decorating. This all looks nice and neat and organised, until you see what I am actually like when decorating!


Yep stuff everywhere! I have tubs full of frosting, bowls with more frostings, sprinkles, paste colours, icing bags, tips etc etc!! Organised chaos is how I like to see it!

You can frost large flat areas with buttercream. You need cornflour (cornstarch) and your finger!

Firstly, fill a piping bag with frosting and fit a large round tip (I used Wilton #12). Pipe some frosting onto your cookie.


Next you need to dip your finger in some cornflour and begin to push and flatten the frosting you have just piped. I press down and out to the edges, only occasionally adding extra frosting if needed. You will need to dip your finger a few times. The cornflour stops your finger from getting covered in frosting, and keeps the frosting where you want it, on your cookie!


The cornflour can leave residue like this but most dissappears after a while and the rest you can gently brush off.

Once you have filled in your cookie, you can go ahead and decorate it. I piped lines and zigzags onto the egg shapes and decorated with small chocolate beans.


These came from a sprinkle selection that you can purchase at Sainsburys. You could even use mini smarties or dots of icing.

For the butterfly shapes I used 3 frosting colours.


I firstly piped around the edge in pink and flattened this. I then took some yellow to create the body and head. I then filled in the remainder with blue.


I then flattened this into place.


Finally I decorated these with dots of icing, gave them a face and used the long sprinkles as antennae.


The flowers were pretty simple as I completely filled them in one colour and then decorated with the chocolate beans or frosting dots.


For the tulips, I used an edible food writer to draw lines over the buttercream to look like the petals.


For the bunny faces I did the exact same thing, covering the cookie in one colour.


I used a little pink for the ears, again flattening with cornflour. then took Wilton tip #3 and gave the bunnies their features.


When flattening buttercream, it doesn't give as smooth a finish as say royal icing, but it sure does make the cookies tasty!

They are bright and fun. You can get shaped cookie cutters from hobby shops, supermarkets and the good old web! These are from a Wilton set of 101 cookie cutters. They have been used many many times and not just for cookies!

Will you make cookies for your Easter gathering? Share on my Facebook page.

Have a great weekend!



Wednesday, 25 March 2015

DIY Easter Wreath

So earlier on this year I decided I wanted to make a wreath for Easter. I had repurposed an old wreath for Christmas and had enjoyed making it and displaying my own work. I thought about buying a basic wreath that I could update for other holidays and seasons and then I had the bright idea of making my own wreath from scratch! Good idea in theory but as you will see I didn't completely think it through and had to improvise so as not to waste everything I had done and bought! As well as the wreath almost being a disaster I took pictures of my work in progress only to realise that I didn't have the memory card in the camera half the time! So some of the details have no pictures, you will just have to use your imagination!

My bright idea was to use items I already had to make a basic wreath shape and then purchase just a few bits of pieces to decorate it with. The point was to show a cheap way to make a wreath!

I started with a bunch of yellow pipecleaners. I wound them around themselves to provide a round shape.


I had lots from some project ages ago!


I took each end and wound it round another.


I made it as tight as possible so as to not have any sharp edges.

I wound extra pipecleaners over the top of these for structure (hah!).


This left me with this shape. It had very little stability at this stage so I got some yarn and began to wound this round tightly. I did this in stages to make it easier to wind around, knotting the yarn every so often in place.


This gave it the structure I needed, or at least what I thought was sufficient!


I purchased a pack of Styrofoam eggs, some wooden butterflies, wired flowers and paper flowers. For the eggs I painted some with acrylics very roughly to get a marble effect, while the rest I decopaged with tissue paper I already owned.


You can see the rough paint job here. I used acrylic paints that I mixed together to gain these pastel shades.


I did the same with the wooden butterflies which I really love!


I then began to decorate the wreath. I started with the wire flowers and wound them around the wreath in various places to space them out. I then used hot glue to attach the eggs and other flowers. I used some of the left over tissue paper to make paper flowers which were great fillers.


I strung the butterflies with some fine cotton and knotted these to either side of the wreath, covering the knots with eggs and flowers so that they hung in the middle.

When I was done I picked up the wreath to see any gaps and that's when I realised that the whole thing wanted to sit like a giant egg! It looked awful! I was going to jack the whole thing in but I didn't want to waste all the pretty things I had bought, so I spotted this massive cardboard photo prop I had used for a long ago birthday and traced the wreath onto the back of it. This is where you have to use your imagination as clever clogs here had taken the memory card out and didn't notice the camera flashing warning me about it until it was too late!

I cut a large cardboard circle out and glued the wreath to it. I then carefully cut this to fit more neatly to the already finished wreath. As the wreath was already covered at this point, I couldn't get as close as I would have liked so added more tissue paper flowers and some large felt butterflies that I had laying around to cover it over. I also had left over all the middles to my die cut flowers from my Spring garland which made good fillers too. The cardboard gave the wreath the structure it needed to hold a round shape. Definitely not the way to do it and I certainly won't be using pipecleaners in this way again! I will just buy a plain wreath in future!!


The overall result after the disastrous DIY isn't too bad. I think some green foliage would have been a nice touch to break up the colours a bit. 


I am pleased to say I can't see any cardboard!

Have you made a wreath for Easter? Have you had any disasters? Share on my Facebook page! At least to make me feel better!

Happy Wednesday!


Monday, 23 March 2015

Easy Easter Bunting

Do you decorate your home for Easter? I think it's less done here in the UK, but you do see bunting, window clings, fake eggs etc in the shops. 

My kitchen has my Spring flower bunting and looks suitably festive for the upcoming holiday. I love bunting, there is something so sweet and quaint about it. It seems to be totally girlie and has endless possibilities when using it to decorate with.

A few years ago I decided to make some Easter bunting. I am hopeless at sewing so came up with the idea of using card as well as fabric to make some. I gathered together fabric scraps that I had to hand in suitable Easter colours along with coordinating card. The fabric consisted of felt and fat quarters. I had lots of Easter themed stickers and some left over brown fabric from another crafting session.

You can use pretty much anything to make this bunting. I had scrapbook and card making stickers, fake flowers, rabbit shapes cut from patterned paper, jute string, curling ribbon and fibres.

I began by finding a suitable font I could use for the letters which were to appear on the bunting. I chose a simple font, enlarged the letters and printed them out. I then cut out each letter and traced it onto the brown fabric. I carefully cut out the letters ready to stick onto the bunting.

You could use a much fancier font if you like, but I found the easier the shape, the easier to cut out!

I then drew a triangle onto a piece of card and used this as my template. I traced around this shape on a variety of fabrics and cards and cut them out. I then glued the letters onto the triangles. You can use regular adhesive or fabric glue.

Next came the fun part! Decorating!  I decided I wanted a bit of decoration at each point of the triangles. As some were stickers, I didn't need any additional glue. For non stickers I again glued these with regular adhesive or fabric glue.

When that was all dry I glued jute string to the back of each triangle across the top. I eyeballed the spacing needed between each letter before gluing in place. I left lots on either side to enable the bunting to be strung up. I did 2 lots for each word, rather than one long piece.

All done and super easy! Children will love to decorate the triangles.

Later this week I will be sharing my home made wreath, and the wrong ways to go about it! Thankfully it is all good in the end!

Have a great week!