Showing posts with label recycle. Show all posts

Tuesday, 11 August 2015

Cutlery holder from tin cans

The summer holidays are flying by. We have been very busy. Busy in a good way of course. This week my son turns 10! I can't believe how time has flown. I am so lucky to have a great kid. He is getting pretty spoiled this birthday! Well you only turn 10 once right? We are taking a bunch of his friends go karting then out to dinner. His best friend is staying over and then we are going to watch the Red Bull Air Race at Ascot. Should be a great weekend. Fingers crossed that the rain stays away.

The weather picked up this past weekend and we finally got the barbecue out! Last year I made a cutlery holder with some recycled tin cans. It was a quick project and pretty basic looking.


Whilst colourful, I felt it was missing something. I decided to make it over for this year.

I started by painting all 3 cans off white. To cover the original bold colours took about 3 coats.


They looked so much better just painted all the same colour. I wrote out 'Knives', 'Forks' and 'Spoons' in pencil, the carefully painted over the letters in red using a very fine brush.


I sprayed the paint work with clear sealer to protect it, then got about a metre of gingham ribbon which I glued to the top and bottom of each can to give them simple embellishment. 

I think the red and blue together is lovely and bright, perfect for the summer.


I also made a little bunting to complement them.

Long may the sun shine!


Tuesday, 28 July 2015

Nail Polish Rack DIY


A couple of months back my friend introduced me to a warehouse housing all manner of vintage, recycled and new items called Molly's Den. Check out their website here. It is a giant treasure trove housing pretty much anything you can think of! It was very hard to choose what to buy! I did go with a purpose but that soon went out the window when I saw how much was there.

I just loved the metal key shaped key holder!

Pretty bottles and bowls.


This was one of my favourite things, so naturally it had to come home with me!


Here it is looking pretty on my shelves in my reading corner.

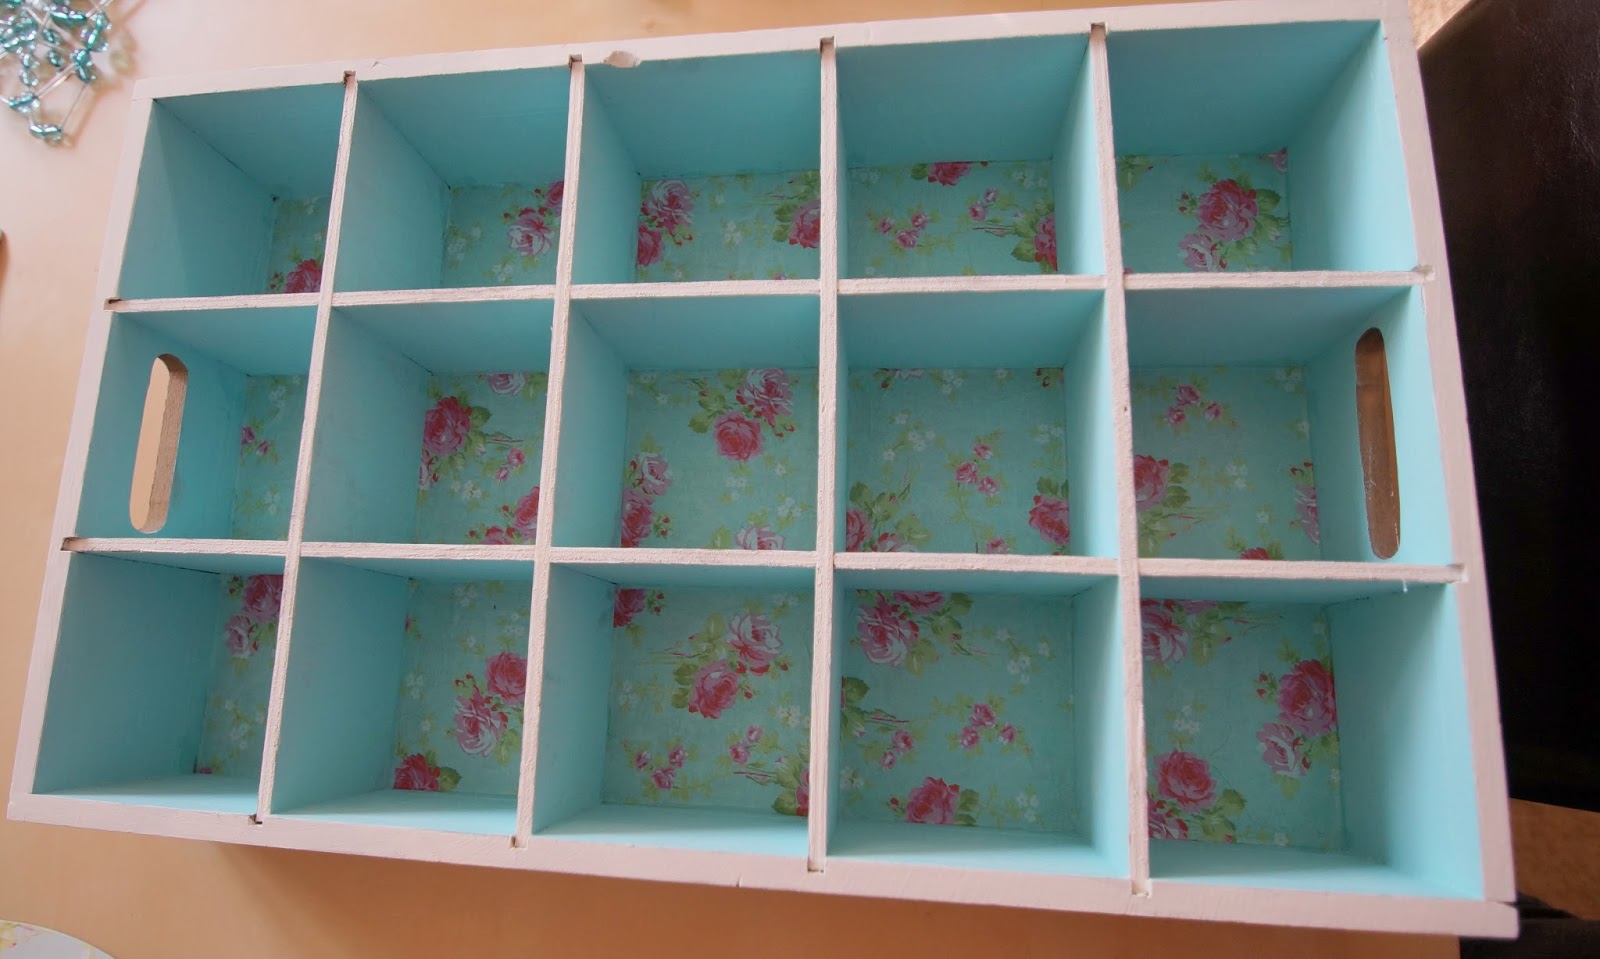
I also picked up a wooden seed tray to make a nail polish rack.

I liked the rough feel of the seed tray and the stamped sides. I did want to pretty it up though, so I began by giving it a clean and then painting each compartment.


I decided to leave the sides of the box as they were.


The wood soaked up the paint so 3 coats were necessary for complete coverage.


I then cut some squares of Decopatch paper for the inside of each compartment.


I used this bright pink and light teal paper which I had previously used on my jewellery box.


I measured the squares and cut the paper to fit.  I applied glue to the back of each compartment and fixed a piece of Decopatch paper to it.

You can see that I didn't bother with as many coats of paint for the back of each compartment as I planned to cover with the paper like so. The sides have a more solid look of colour.

I continued to do this for each compartment, and once dry I painted over each stuck piece with glue to seal it.


I had originally decided to leave the edges like this, unpainted. However, a little off white paint soon changed my mind!

All finished, now to fill it up with nail polish!


Admittedly you can't see much of the back but there is a little hint poking through. 


I took these photos before we made over the master bedroom. The plan is to affix hooks to the back of the rack so that it can hang on the wall. It's one of the many little jobs left to do to make the bedroom even prettier!

Hope you are enjoying the school holidays!


Wednesday, 17 December 2014

THE CHRISTMAS TABLE AND BAUBLE MAKEOVER

If you are like me you are probably getting the last few jobs done before all the Christmas food prep begins! I have fudge, cookies, cake and pie to make before the big day so this will be the last before Christmas post.

When I was decorating my tree I pulled out these old baubles of mine that are meant to look frost covered. Over the years, the coating has begun to come off and show the black colour underneath. I decided they were no longer tree worthy but hated to throw them away, so what else could I do? Make them over of course!!

Here they are pre make over!


They are a mixture of light and dark gold and as you can see those colours are wearing thin!


Nasty chip in that one!

I didn't think trying to take the coating off would be very successful so I decided just to paint over them with bolder colours! I liked the idea of using them in the kitchen as ceiling decorations after a few pins I've seen. My kitchen is painted a warm yellow, and my dinner service is primarily blue, so I took half and painted blue and the other half gold. I just used paints I already owned.

Even after painting them, you can still see a hint of the black underneath.


Plus the paint gave them an almost caviar effect, like you can have on your nails. This was not the look I was going for and they certainly did not feel Christmasy! Luckily I have gold and blue glitter paint which I liberally painted all over the baubles.


Up close, you can still see some of the black but it's hardly noticeable now they are suspended from my ceiling!


I love the blue in particular. It's not traditional at all but feels really festive!


I took the original ties off and added different lengths of ribbon so that when they are suspended on the ceiling they create an interesting effect. I chose to hang them directly over my table so no one is hitting their head on them!


They are suspended by making a small loop in the ribbon and then using push pins.


This complements my Christmas table very well. I have a blue fabric runner and place mats, so rather than purchase anything else I incorporated them into a theme with gold and glitter!

I did purchase these adorable blue glitter reindeer though!


They just go so well!


A blue Christmas!


Standing proudly at either end of the table.


I took some blue baubles, added ribbon and attached to the back of the chairs. I didn't want huge ribbons, mainly as it would be too much temptation for the cats!


They tie the theme together.

I bought some cheap gold chargers, gold napkins, blue and gold confetti stars and tiny gold baubles to be used as place cards.


I'd seen rosemary being used as place name wreaths but here I have used a small sprig of thyme which has been attached to the bauble. I took simple kraft tags and wrote the names on them. 


I love my new chargers!


I have added light blue candles that I already owned along with my fun and festive salt and pepper shakers. For Christmas day I will be adding the gingerbread house that my family will make on Christmas Eve. It is one of our traditions!


The candles may have to give up their spot on the table!

I hope you enjoyed a look at my table and that you have been inspired for your own celebrations!
Merry Christmas!