Showing posts with label bow. Show all posts

Wednesday, 21 January 2015

Little heart hangers


The weather is dreary and grey so I just have to get crafting and think of warmer, brighter days. I am currently updating my downstairs bathroom, just a few cosmetics changes and I can't wait to show it to you but it's not quite done yet!  Plus today is National Hug day, so in light of that I wanted to show you these lovely little hanging hearts that I made late last year.

I bought a bag of plain wooden hearts from Hobbycraft and used 3 of the largest ones for these hangers.


As you can see they are unfinished and perfect for embellishing.

Firstly I painted both sides with acrylic paint. I left the edges plain for contrast.

After this I drew an initial in the middle of the heart and painted it white. I also added dots to make them less plain.


After they were completely dry I painted a couple of coats of clear varnish to protect them. Next I drilled a small hole at the top, got some thin jute thread and chose some beads to thread on and through the hole. Finally I tied a small bow at the top to finish them off.


Pretty little gifts or something to hang on your door.  You can always add more than one heart to the hanging to make it a little larger as I've done here. I also used rub ons rather than paint to embellish the front.


If you don't like wooden hearts you could always embellish a fabric heart or make one yourself. This one here I embroidered the word 'Love' and glued tiny sequins around the edge.

Happy Hug Day!


Wednesday, 17 December 2014

THE CHRISTMAS TABLE AND BAUBLE MAKEOVER

If you are like me you are probably getting the last few jobs done before all the Christmas food prep begins! I have fudge, cookies, cake and pie to make before the big day so this will be the last before Christmas post.

When I was decorating my tree I pulled out these old baubles of mine that are meant to look frost covered. Over the years, the coating has begun to come off and show the black colour underneath. I decided they were no longer tree worthy but hated to throw them away, so what else could I do? Make them over of course!!

Here they are pre make over!


They are a mixture of light and dark gold and as you can see those colours are wearing thin!


Nasty chip in that one!

I didn't think trying to take the coating off would be very successful so I decided just to paint over them with bolder colours! I liked the idea of using them in the kitchen as ceiling decorations after a few pins I've seen. My kitchen is painted a warm yellow, and my dinner service is primarily blue, so I took half and painted blue and the other half gold. I just used paints I already owned.

Even after painting them, you can still see a hint of the black underneath.


Plus the paint gave them an almost caviar effect, like you can have on your nails. This was not the look I was going for and they certainly did not feel Christmasy! Luckily I have gold and blue glitter paint which I liberally painted all over the baubles.


Up close, you can still see some of the black but it's hardly noticeable now they are suspended from my ceiling!


I love the blue in particular. It's not traditional at all but feels really festive!


I took the original ties off and added different lengths of ribbon so that when they are suspended on the ceiling they create an interesting effect. I chose to hang them directly over my table so no one is hitting their head on them!


They are suspended by making a small loop in the ribbon and then using push pins.


This complements my Christmas table very well. I have a blue fabric runner and place mats, so rather than purchase anything else I incorporated them into a theme with gold and glitter!

I did purchase these adorable blue glitter reindeer though!


They just go so well!


A blue Christmas!


Standing proudly at either end of the table.


I took some blue baubles, added ribbon and attached to the back of the chairs. I didn't want huge ribbons, mainly as it would be too much temptation for the cats!


They tie the theme together.

I bought some cheap gold chargers, gold napkins, blue and gold confetti stars and tiny gold baubles to be used as place cards.


I'd seen rosemary being used as place name wreaths but here I have used a small sprig of thyme which has been attached to the bauble. I took simple kraft tags and wrote the names on them. 


I love my new chargers!


I have added light blue candles that I already owned along with my fun and festive salt and pepper shakers. For Christmas day I will be adding the gingerbread house that my family will make on Christmas Eve. It is one of our traditions!


The candles may have to give up their spot on the table!

I hope you enjoyed a look at my table and that you have been inspired for your own celebrations!
Merry Christmas!


Wednesday, 3 December 2014

CHRISTMAS WREATH CUPCAKES


I wasn't planning to do anymore Christmas cake posts this year until I got news that cakes were wanted for the school fair. I think it's always nice to theme them when I can and I had toyed with the idea of making a cupcake wreath for a while. My main sources of inspiration came from these pins herehere and here. I knew that I had limited space so scale wise I had to ignore how elaborate the original ideas were. I am a traditionalist when it comes to colours for Christmas, so pink is never something I would do, but I really liked the idea of holly leaves over other Christmas shapes. I also really liked the idea of the bow on 2 of the pictures and swirled frosting.

I made chocolate cupcakes from The Hummingbird Bakery and used their basic vanilla frosting recipe for the base for my peppermint flavour.

I always use Trex in my frostings as it's a lot stiffer than butter/margarine and, being white, it means that my frosting is always white ready for perfect tinting. I don't like the yellow tinge you get when using other fats. I also find the taste is really good and never too sweet (unless you are making almong frosting, then watch out!). 


Trex is essentially lard, which sounds gross, but when paired with icing sugar and flavourings, makes a great frosting! 

I did a 3/4 batch for my cupcakes which meant I had a little left over, but half would not be enough. I'll just have to frost a few cookies that are lurking in the cupboard!

This is my adapted recipe from the Hummingbird Bakery for a 3/4 batch.

180g Icing sugar
60g Trex
1 1/2 tsp peppermint extract (can use a bit less if you like just a hint)
Splash of milk.

Mix the icing sugar and Trex together, it will form bread like crumbs. Add in a splash of milk and flavouring, keep mixing. Add a little more milk until you get a smooth well mixed consistency.

I always use paste colours to tint my frosting as they never thin the frosting out. For deeper colours like red, I tend to start with small batches of frosting to ensure a nice deep colour. Too much frosting means you end up with a light shade. I also add a little, mix, then more until I find the right shade. The colours do deepen after a while so long as they are not set in direct sunlight.

I like the Wilton paste colours as they are easy to use and last a long time.
For this frosting I have used the Kelly Green shade.


I always use a toothpick to add the colour to the frosting. This means you can add as little or as much as you need easily. For this rich green I added 3 toothpicks worth of paste colour.


I filled a disposable bag with the frosting and added Wilton tip 2D to frost swirls or roses onto the cupcakes.

 Yummy cupcakes, primed and ready for frosting!


Such an easy and cute way to frost! Start in the middle and swirl the frosting around to the edge. In other colours like pink, they look like roses.

I have some old cookie cutters from my childhood, a tree, Santa and some holly. The holly has come in handy a couple of times when I've needed fondant holly leaves.


Urm, must remember to take pictures before using!

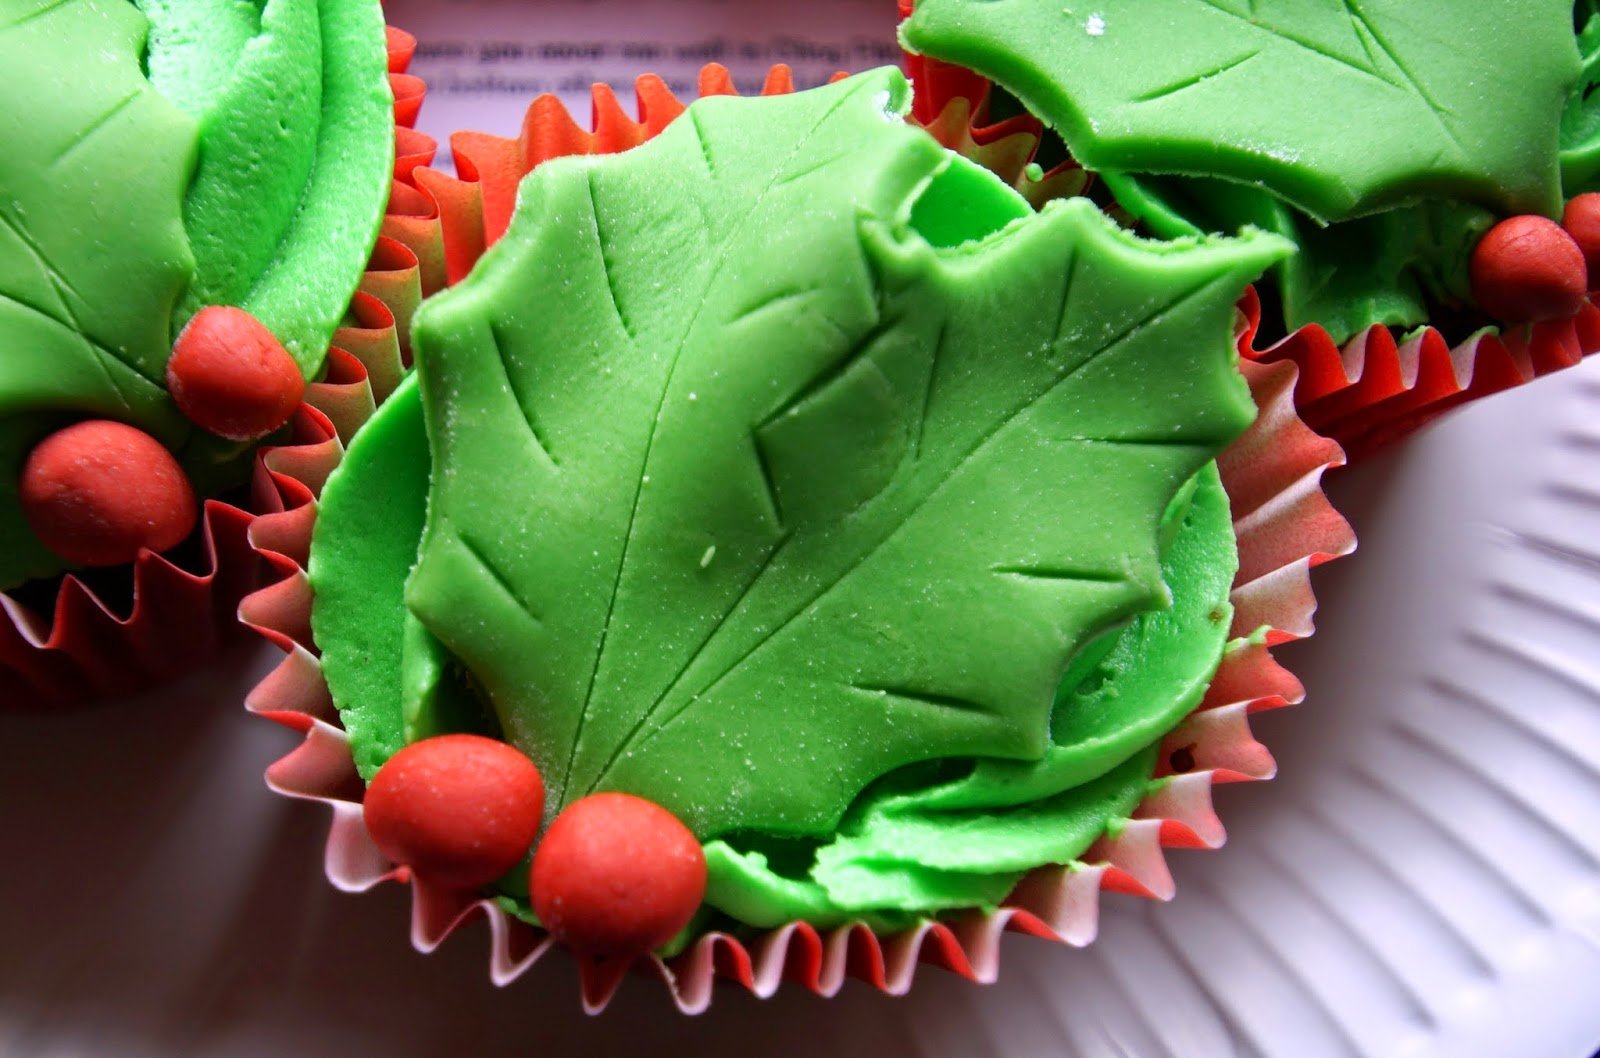
I cut seven holly leaves out of some green fondant. The embossing on the cutter didn't go through to the fondant, so I just drew the lines in myself. I then got some red fondant and rolled small balls for the berries.


I then arranged these on the cupcakes to resemble a wreath, slightly overlapping a couple of them, then I just attached the berries to the base of the leaves.

 I left the top one blank for the bow.


Looking festive already!

The bow was a little tricky and I actually made the parts of the bow before I decorated with the holly leaves so it had a little time to dry out. I found this round up of bow tutorials on Pinterest here. It's mainly just pictures but pretty self explanatory.

First I rolled out and cut the shapes I needed for the bow from red fondant.


I didn't roll them out too thinly so they were fairly easy to handle, but if anyone can tell me how I can stop sticking my fingernails into my nicely formed fondant shapes let me know!!

I folded the 2 larger rectangles and pinched one end to form the crease of the bow. As per the tutorial, I stuffed the hole with some paper towel to stop them from collapsing. I bent the tails of the bow to give them some shape and left them to dry for a few minutes while I prepped the rest of the design.


I pinched the ends of the tails as well so that they could easily be placed under the main part of the bow.


I placed the tails first, then wrapped the smaller rectangle around the bow loops and attached them to the top cupcake. I felt the bow looked a little dull so spruced it up with some edible lustre dust, I also used this on the berries and green lustre dust on the leaves. From preparing, to baking to decorating, the cakes took me 2 hours. Simple and easy when you need something festive in a hurry!


Happy baking!