Showing posts with label glue. Show all posts

Tuesday, 28 July 2015

Nail Polish Rack DIY


A couple of months back my friend introduced me to a warehouse housing all manner of vintage, recycled and new items called Molly's Den. Check out their website here. It is a giant treasure trove housing pretty much anything you can think of! It was very hard to choose what to buy! I did go with a purpose but that soon went out the window when I saw how much was there.

I just loved the metal key shaped key holder!

Pretty bottles and bowls.


This was one of my favourite things, so naturally it had to come home with me!


Here it is looking pretty on my shelves in my reading corner.

I also picked up a wooden seed tray to make a nail polish rack.

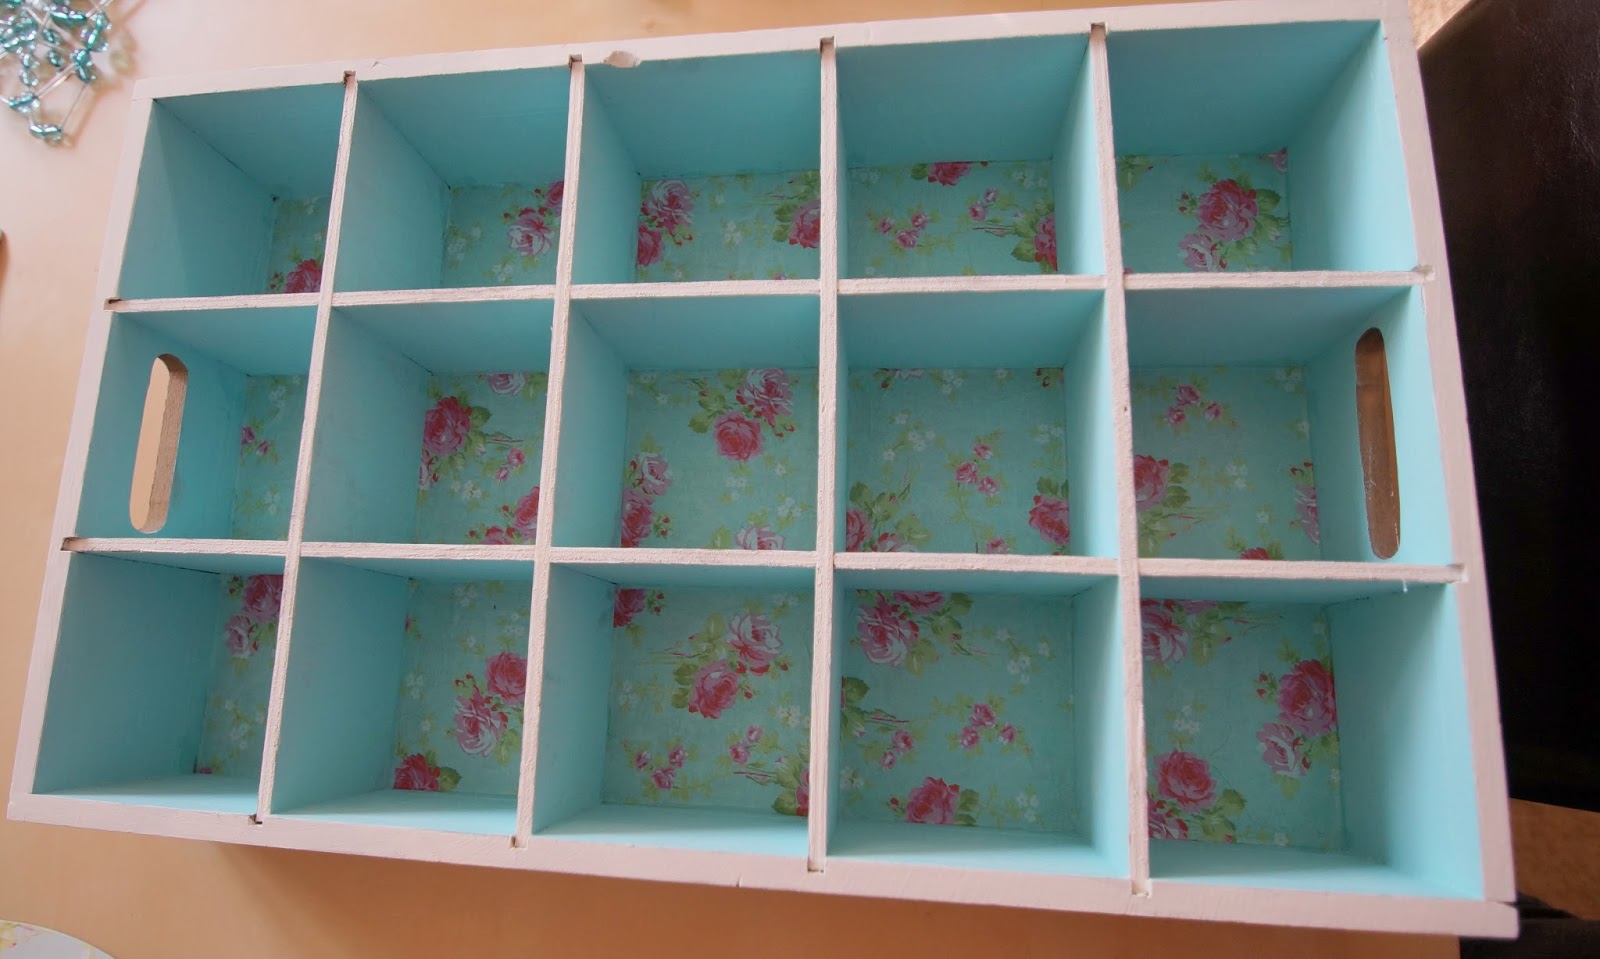
I liked the rough feel of the seed tray and the stamped sides. I did want to pretty it up though, so I began by giving it a clean and then painting each compartment.


I decided to leave the sides of the box as they were.


The wood soaked up the paint so 3 coats were necessary for complete coverage.


I then cut some squares of Decopatch paper for the inside of each compartment.


I used this bright pink and light teal paper which I had previously used on my jewellery box.


I measured the squares and cut the paper to fit.  I applied glue to the back of each compartment and fixed a piece of Decopatch paper to it.

You can see that I didn't bother with as many coats of paint for the back of each compartment as I planned to cover with the paper like so. The sides have a more solid look of colour.

I continued to do this for each compartment, and once dry I painted over each stuck piece with glue to seal it.


I had originally decided to leave the edges like this, unpainted. However, a little off white paint soon changed my mind!

All finished, now to fill it up with nail polish!


Admittedly you can't see much of the back but there is a little hint poking through. 


I took these photos before we made over the master bedroom. The plan is to affix hooks to the back of the rack so that it can hang on the wall. It's one of the many little jobs left to do to make the bedroom even prettier!

Hope you are enjoying the school holidays!


Tuesday, 21 July 2015

Personalised Notebooks/Journals


This week is the last week of school, so naturally thoughts turn to teacher's gifts. We normally make a little something so that they get something fairly unique from our family.

One of the things we enjoy making are personalised notebooks. Taking something plain and boring and giving it a lovely individual look, and hopefully geared towards the recipient.

Earlier on in the year I shared my decopatch covered notebook for Mother's Day. It's the lovely polka dot book you can see here. For details of how I made that one head over to this post.

Another great way to cover a notebook is with fabric.


I cut the fabric to size and then glued this to the front and back covers of the book. I added a ribbon tie in the same way as I had done for the decopatch covered book.


Another fun idea is to cover the book completely in glitter! The glitter I used here was quite coarse and I would recommend using a fine glitter for a smoother finish. I firstly painted the book in a colour that was similar to the glitter I was going to use. Once that was dry, I then covered the book in glue and began to sprinkle the glitter all over it.  You have to be very generous so as to cover the front of the book completely. You may find you have some gaps at the end where you can just add additional glue and glitter to.

Repeat this process on the other side of the book. Once this is completely dry you need to spray the entire notebook with clear sealer. This will stop the majority of the glitter from coming off! I also added some embellishments to the front along with a ribbon tie.

For an even quicker project, use stickers! Here we have used travel stickers as the recipient is going travelling for a year.

Firstly we took the little Smash book we found with travel notes inside, and stuck this to the inside cover of the notebook.

We then covered the front with the person's name and a selection of the travel stickers we had purchased.

Simple yet personal. To add an extra personal touch, my son wrote in the front of the book.

A heartfelt note is always lovely to receive.

All ready to give tomorrow!

Enjoy those last school days!


Tuesday, 23 June 2015

No sew Burlap Table Runner

How did your Father's Day go? I was sadly working but as I work at a gliding club, I was able to treat my husband to a flight in one of the club's gliders. He liked it so much he went up again later that afternoon. I got to spend lots of time with him and my son who became our youngest receptionist that afternoon! My manager kindly took my boy for a trip round the airfield which he was super excited about. It's lovely working in such a nice sociable relaxed environment. We treated my husband to a meal out in the evening rounding off a lovely fun day for him.

When we aren't out to eat (which isn't very often I have to say), I love to cook. Since I began meal planning, I've found how much easier it is to just make something from scratch that we can all enjoy and love to eat. Sure I pick quick and easy meals (I fully utilise my slow cooker!) for weekdays but knowing it's all homemade is very satisfying.

We have not changed our kitchen since we moved into the house over 7 years ago. It was put in the year we moved so we decided to live with it, even though the layout is bonkers (lots of wasted space) and the style is not to our taste. We were pretty appalled by the state of the ceiling and the walls however, so a couple of years ago I painted it a lovely warm yellow and bought and made some wall art to make the place feel more like ours. I got some new appliances and cake stands which has transformed the kitchen into a place I like to be. 


We have this gorgeous tile top dining table which went beautifully with the changes, but it still felt like something was missing. I started looking for ideas on Pinterest and saw lots of crafts with burlap. I really liked the idea of a table runner and decided burlap was the way to go! I like old fashioned, vintage style items over modern and burlap fits the criteria, not to mention blending in well with my kitchen!

I remembered seeing some small rolls of burlap in Hobbycraft, so went off to investigate. I bought a large 2m roll in cream (you can purchase online here) rather than the darker more usual shade of burlap. I also bought some cream fabric paint and a reel of lace trim (purchase here).


I already had other fabric paint colours, so gathered them together so that I could decide what would look best with the cream.

Firstly I unrolled the burlap and laid it out on the table.


The 2m roll was the perfect size for my table with a little overhang at each end. As you can see it is frayed as you would expect. I have very little sewing skills and decided that I would glue the lace trim to the edges of the burlap.


I trimmed the frayed part down but left a little for the lace to adhere to. I found some large pieces of card and placed them under the burlap to protect the table. By completing the project on the actual table it was for helped with the design and scale.


I measured out some of the ribbon for the ends and cut with just a little overhang. The reel I used was 5m which was the exact amount I needed to do all four edges.


I next drew a thin layer of fabric glue and gently placed the ribbon down from one end to the next, pressing down as I went along.


I followed this same method on the sides. I glued both ends first and then the sides so that the ribbon from the sides would be stuck over the top of the ends. When the glue was dry, I trimmed away the last pieces of the frayed edges that were showing next to the ribbon edge. For the detail on the runner I used a home made stencil. You could easily buy one.

I found a leaf border over on The Graphics Fairy which reminded me of the painted olives on my dining table. They seemed Italian in design! I then used PicMonkey to design a monogram with the border and printed it out on A4 card.


I chose a fairly simple border that would be easy to cut out. The font was kept simple for the same reason. I used a craft knife and carefully cut out each segment of the border and letter. This was surprisingly easy and took me about half an hour to complete.


I laid the runner out flat so I knew how much overhang there would be on each side. I then laid the cut stencil out on one end of the runner near the edge of the table. The cream fabric paint I purchased was too close to the colour of the runner so I decided to use yellow and blue to match the kitchen and the table. I took a small sponge to dab the paint onto the stencil.


I used a bit of tape to hold the stencil in place and used the fabric paint very sparingly so as to not bleed or smudge the design. When I took the stencil off I took a very thin paintbrush to fill in any gaps or pale areas of the design. I also decided that the F looked a little washed out on the burlap, so outlined that in blue to match.


Before edging.


After!

Some of the paint I used was actually acrylic craft paint rather than fabric paint. I have read that to set this in place you should iron it. I have to say I have yet to do this, but I am only planning to sponge clean the runner rather than wash it to stop it fraying any further.

I am so pleased with how this turned out. It has given my table a new lease of life!

I decided to keep the design uniform and re used the stencil on the other end of the runner. The stencil could probably have been used a couple more times if I had wished. I would certainly use that method again for customised designs.

When the sun shines the whole kitchen feels warm and cosy!

Do you like burlap? Have you used it in any crafts? Do you like a more vintage look or are you modern all the way? Share your experiences on my Facebook page. 

Have a great day!


Wednesday, 25 March 2015

DIY Easter Wreath

So earlier on this year I decided I wanted to make a wreath for Easter. I had repurposed an old wreath for Christmas and had enjoyed making it and displaying my own work. I thought about buying a basic wreath that I could update for other holidays and seasons and then I had the bright idea of making my own wreath from scratch! Good idea in theory but as you will see I didn't completely think it through and had to improvise so as not to waste everything I had done and bought! As well as the wreath almost being a disaster I took pictures of my work in progress only to realise that I didn't have the memory card in the camera half the time! So some of the details have no pictures, you will just have to use your imagination!

My bright idea was to use items I already had to make a basic wreath shape and then purchase just a few bits of pieces to decorate it with. The point was to show a cheap way to make a wreath!

I started with a bunch of yellow pipecleaners. I wound them around themselves to provide a round shape.


I had lots from some project ages ago!


I took each end and wound it round another.


I made it as tight as possible so as to not have any sharp edges.

I wound extra pipecleaners over the top of these for structure (hah!).


This left me with this shape. It had very little stability at this stage so I got some yarn and began to wound this round tightly. I did this in stages to make it easier to wind around, knotting the yarn every so often in place.


This gave it the structure I needed, or at least what I thought was sufficient!


I purchased a pack of Styrofoam eggs, some wooden butterflies, wired flowers and paper flowers. For the eggs I painted some with acrylics very roughly to get a marble effect, while the rest I decopaged with tissue paper I already owned.


You can see the rough paint job here. I used acrylic paints that I mixed together to gain these pastel shades.


I did the same with the wooden butterflies which I really love!


I then began to decorate the wreath. I started with the wire flowers and wound them around the wreath in various places to space them out. I then used hot glue to attach the eggs and other flowers. I used some of the left over tissue paper to make paper flowers which were great fillers.


I strung the butterflies with some fine cotton and knotted these to either side of the wreath, covering the knots with eggs and flowers so that they hung in the middle.

When I was done I picked up the wreath to see any gaps and that's when I realised that the whole thing wanted to sit like a giant egg! It looked awful! I was going to jack the whole thing in but I didn't want to waste all the pretty things I had bought, so I spotted this massive cardboard photo prop I had used for a long ago birthday and traced the wreath onto the back of it. This is where you have to use your imagination as clever clogs here had taken the memory card out and didn't notice the camera flashing warning me about it until it was too late!

I cut a large cardboard circle out and glued the wreath to it. I then carefully cut this to fit more neatly to the already finished wreath. As the wreath was already covered at this point, I couldn't get as close as I would have liked so added more tissue paper flowers and some large felt butterflies that I had laying around to cover it over. I also had left over all the middles to my die cut flowers from my Spring garland which made good fillers too. The cardboard gave the wreath the structure it needed to hold a round shape. Definitely not the way to do it and I certainly won't be using pipecleaners in this way again! I will just buy a plain wreath in future!!


The overall result after the disastrous DIY isn't too bad. I think some green foliage would have been a nice touch to break up the colours a bit. 


I am pleased to say I can't see any cardboard!

Have you made a wreath for Easter? Have you had any disasters? Share on my Facebook page! At least to make me feel better!

Happy Wednesday!